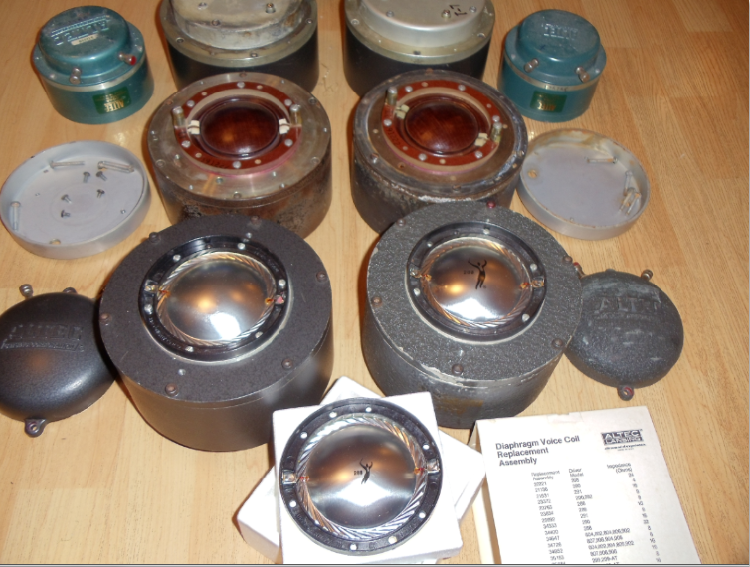
Please see my Altec HF driver collection:
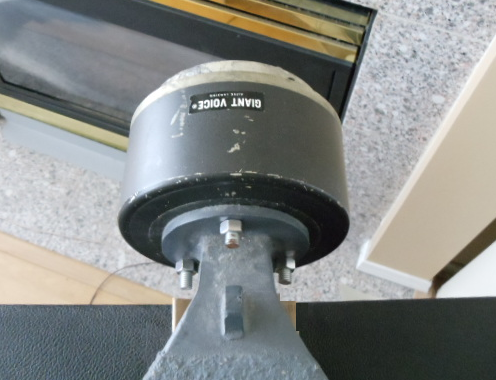
290E GIANT VOICE driver X 4 (large scale driver)
288 driver X 2 (large scale driver)
806 driver X 2 (small scale driver)
See picture:

The sound quality of large scale driver is much better in thickness and warm at middle frequency. Nowadays most available stocks in market are not at excellent condition, but we still can find some of then worthwhile for reconditioning to resume its excellent sound quality. I will use an Altec 290E GIANT VOICE driver as an example to tell the tricks. Please see the structure of a typical Altec HF driver :
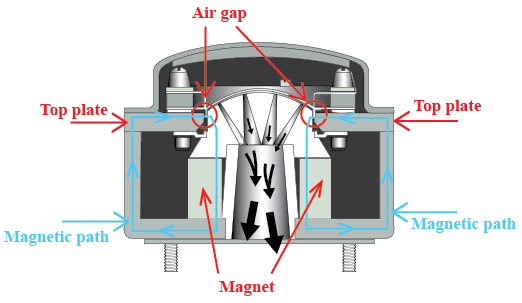
A Typical ALTEC HF Driver Structure
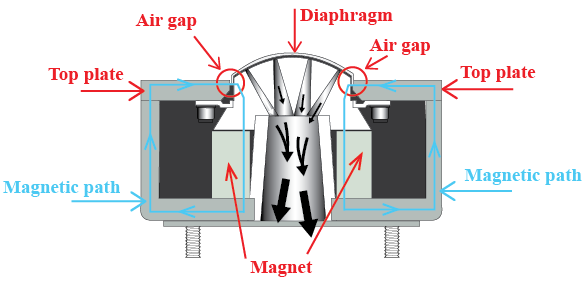
ALTEC HF Driver Cover Removed
Somebody removed the top plate for easy cleaning of the air gap rusty by send paper, and then refit the top plate after cleanning up, this job had interruped the magnetic path of the driver resulting about 50% magnetic flux density loss afterwards and damaged the sound details.
See picture:
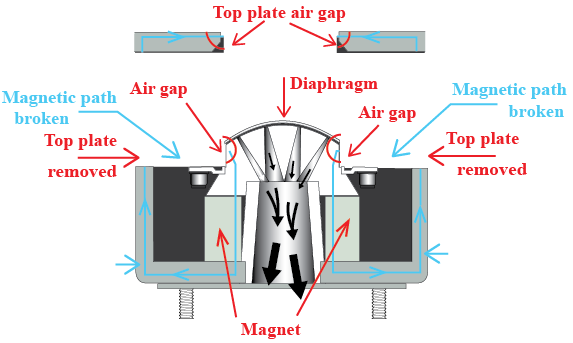
Top plate removed for easy air gap rusty cleaning but magnetic path broken leads to 50% magnetic field loss, even refit top plate can’t help.
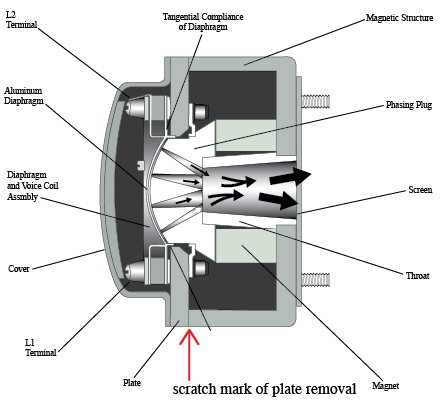
The altec production line charged up the magnetic flux density to specification AFTER the completion of assemble procedures. So we can’t do this unless we can arrange the magnet flux recharge, once the top plate had ever been removed, there is a scratch mark on the driver, See picture:
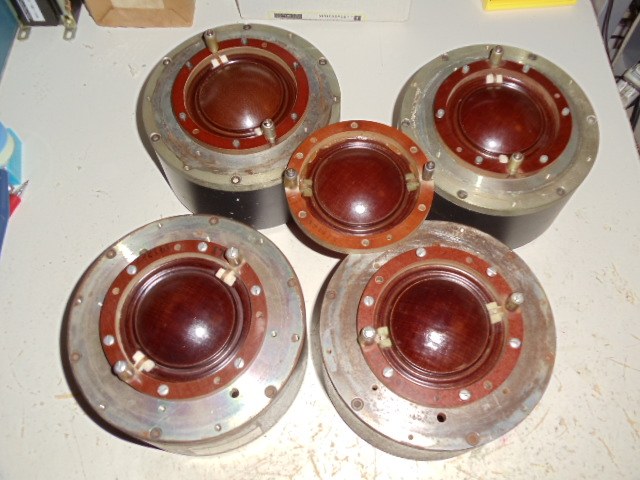
About eight years ago I saw a pair of Altec 288 avaiable in open market with good diaphragm, please see picture:
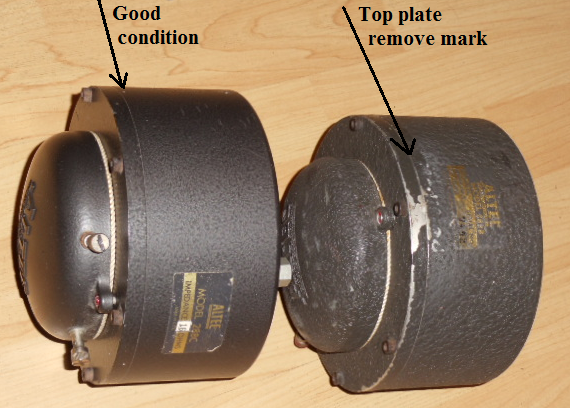
One of the driver shows top plate removed mark so I asked the seller that one driver might have ever been top plate removed for rusty cleaning and seems to be 50% magnetic field loss. He said that he did, but he is an electrical technician and magnetic recharge machine available at working place so that he had arranged magnetic recharging. He sure that the drive now gets the magnetic power up to standard and excellent diaphragms,and besides, a good price so I got them.
See picture:
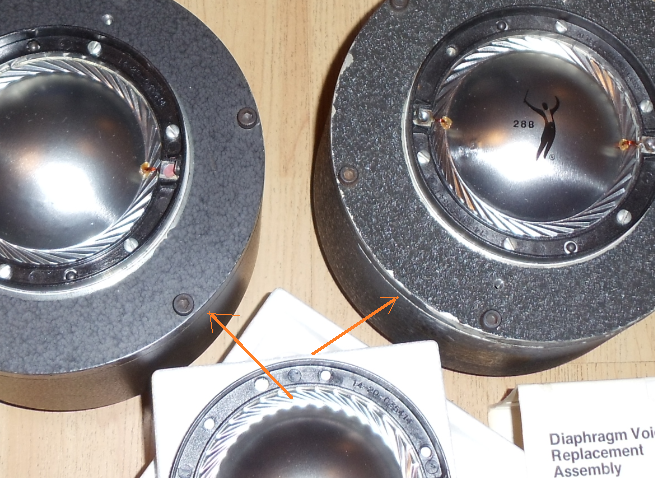
When I measure the diaphragm DCR with a moving coil ohm meter RX1 range, I Found DCR excellent but one voice coil goes up and other goes down. I suppose that guy recharged the magnetic field at opposite direction, compass test confirmed this, see picture :
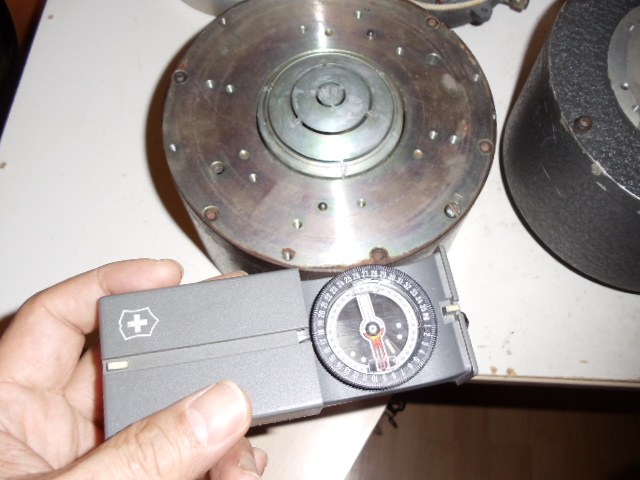
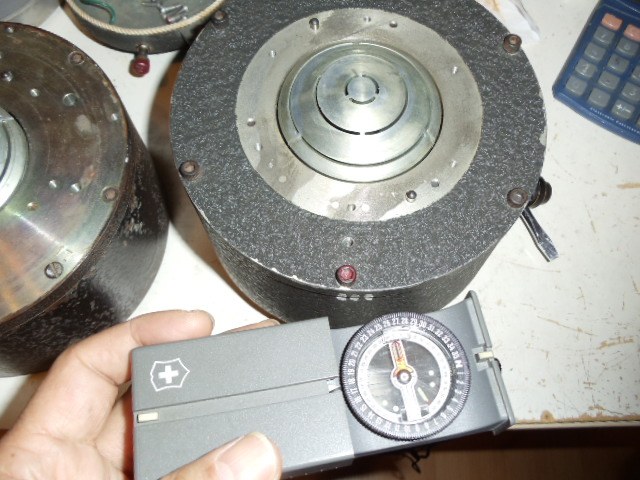
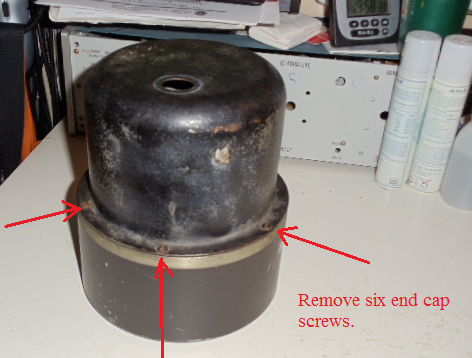
However this will not affect sound quality and easily change the +/- terminal connection can resume the correct phase operation. Now we start to look into the 290E driver assembly, Remove six end cap screws and take off the cap, see picture :
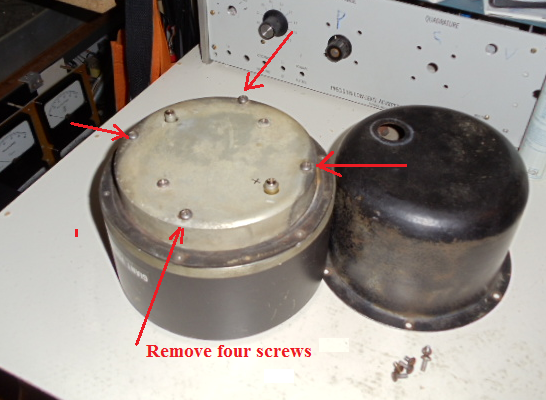
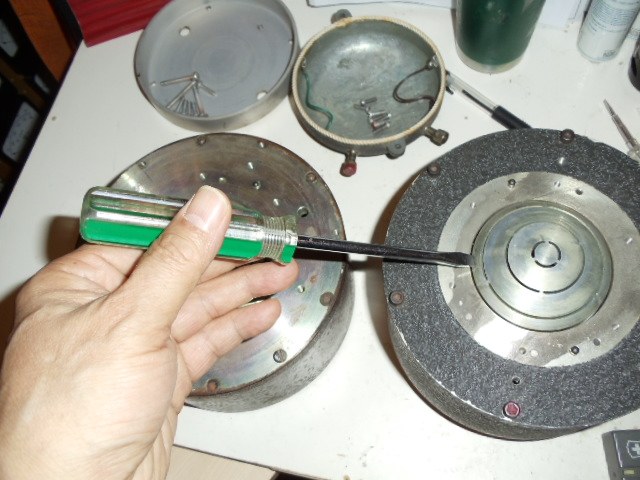
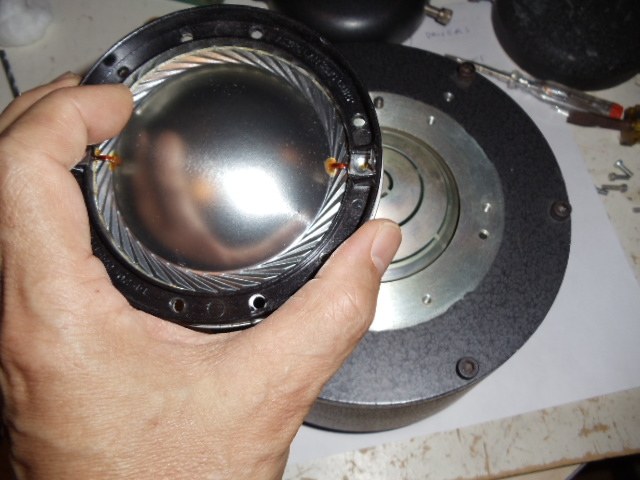
Then remove four diaphragm cover screws to take off the cover :
Then remove six diaphragm fixing screws to take off the diaphragm :

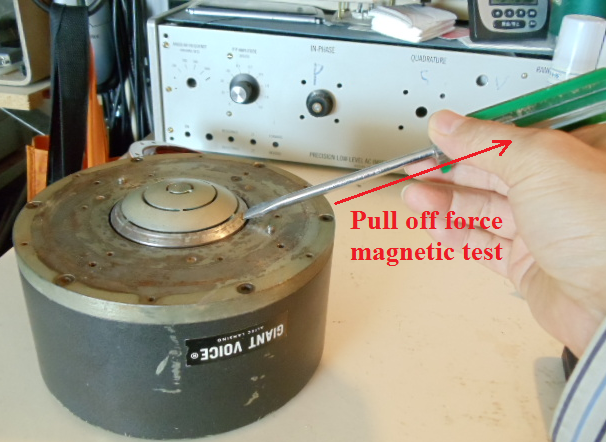
Use a screw driver , put the tip near the air gap and try to pull it off, the force will tell the magnet condition, if we have two or more drivers, by compare the forces we can get an estimation of magnetic flux density, experienced person could easily judge the driver good or not by this simple test :
And the magnetic recharged 288 driver alse tested good :
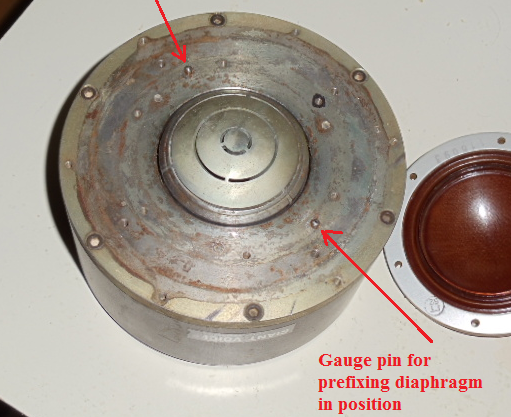
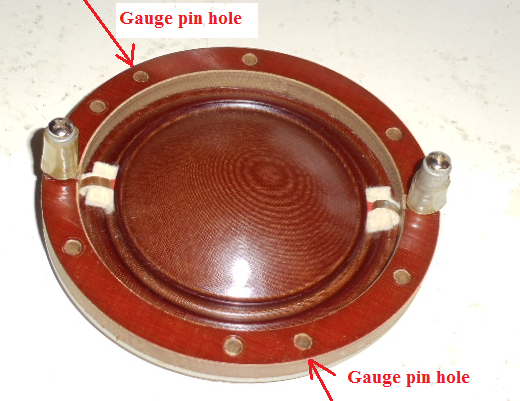
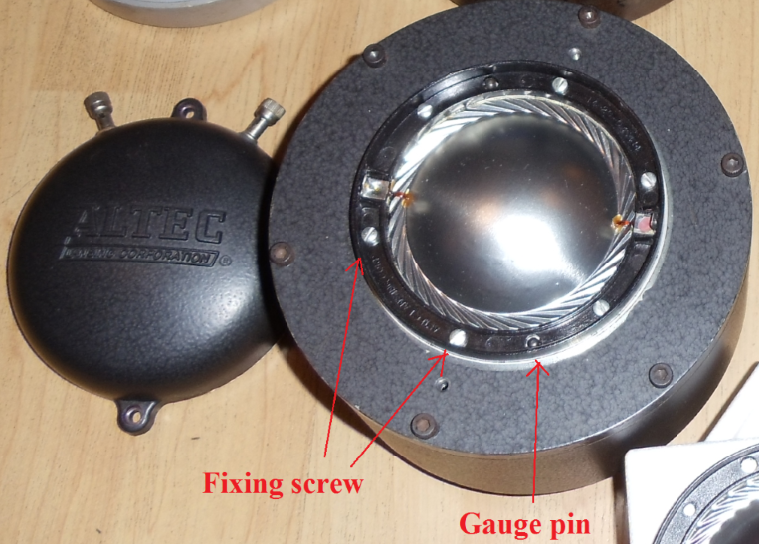
Now we can see the air gap and the guage pin :
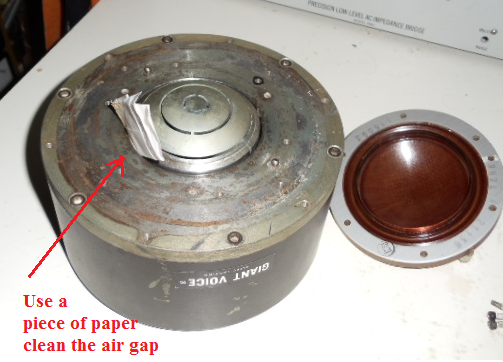
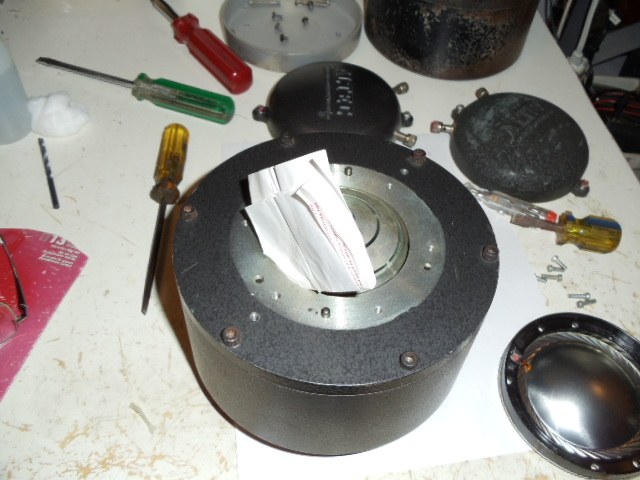
Clean the air gap with a piece of sand paper and writing paper with patient to remove rusty :
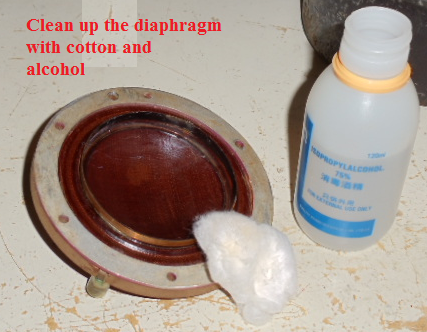
Carefully clean the diaphragm with cotton and alcohol:
Then resume the diaphram as the guage pin will prefix the position, that means we can not adjust the diaphragm position, this was designed for untrained person carrying out on site diaphragm replace in theatre :
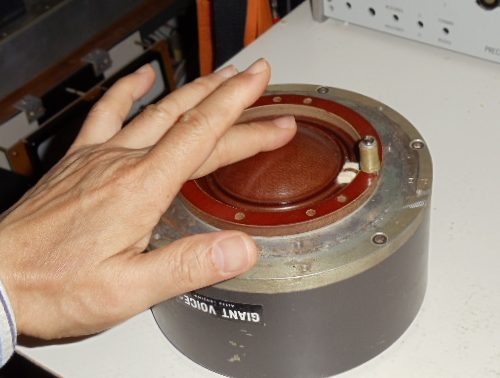
When the diaphragm on position we can gentlely push the dome by a finger tip to feel the voice coil movement freely without touching the magnet, if it works fine, congratulation, you got an excellent driver :
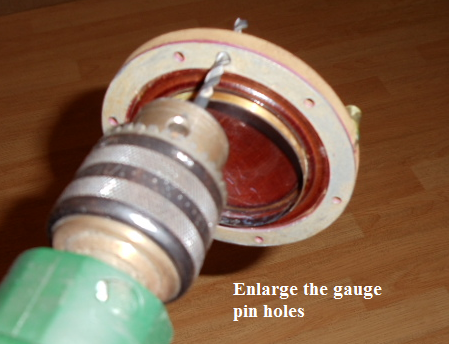
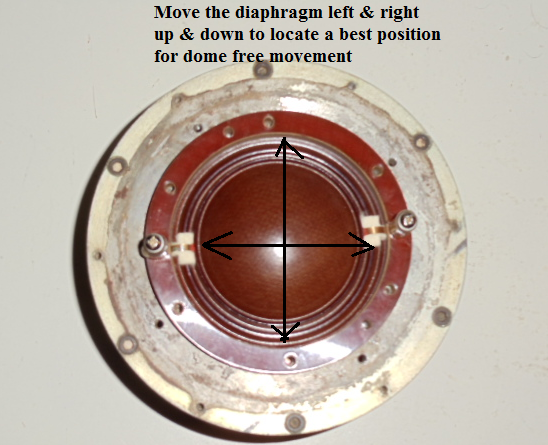
But most case would not, don’t worry , we can carefully enlarge two guage pin holes on the diaphragm with a hand drill 4.5 mm bit , see picture :
Now we can slightly move the diaphragm left & right or up & down to fine tune the position for free voice coil movement, we still can get an excellent driver here :
The diaphragm of 290E is strong and hard to be damaged in installation procedure so this is a very good driver for assembly training practices. When we deal with 288 drivers, the diaphragm is much more vulnerable and extremely care is necessarily. When we turnning the mounting screws, beware the screw driver tip or mounting screw being attracted by strong magnetic force towards the air gap , if so the result will be disastrous and ruin the diaphragm.
The diaphragm removed, procedures very similar to that of 290E :
Also clean the air gap by piece of sand paper and work out the screw driver magnetic force pull off test :
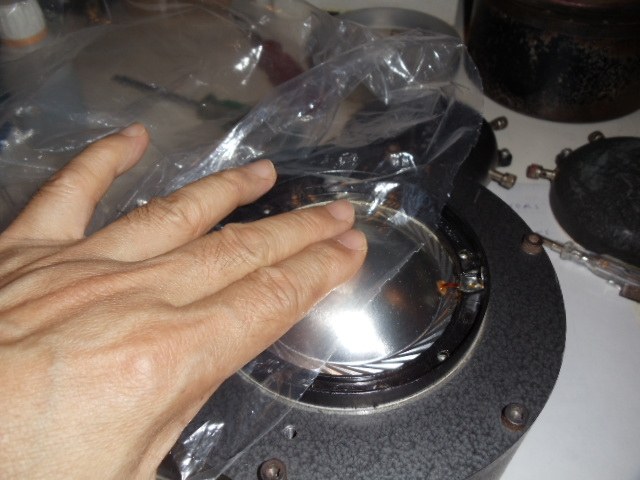
After refit the diaphragm ,again gentlely push the dome by a finger tip to feel the voice coil movement, but this time we use a plastic bag to avoid finger prints, please remember that 288 diaphragms is much more vulnerable than 290E diaphragms. Enlarge the gauge holes and adjust the diaphragm position if necessarily :
The last step is measure the DCR of the voice coils to ensure electrical correct, and then plug and play, enjoy. Both 288 and 290E drivers played in my system sound excellent, 290E more warm human voice 288 more brisk music instruments:

Thank you for visiting!